Oracle CDC to Snowflake using Amazon DMS and Snowpipe
Sometimes it might be said that you would like to benefit from both a classic Oracle database and as well from Snowflake Data Cloud. For instance, your target architecture assumes OLTP workloads to be run in Oracle while typical DWH workloads (reporting, analytics, ad-hoc queries) is run in Snowflake Data Cloud.
Usually, that coexistence requires some sort of solution to replicate data from one database to another. Change data capture (CDC) is the typical approach to address this challenge. It tracks all the changes on the source database and applies them to the target system.
Ideally the solution should be fast and easy to develop, moreover, cost efficient, robust and in real-time. That is why we leverage the Amazon cloud service – Database Migration Service (DMS) and Snowpipe. They are both easy to set up, scalable and at the same time do not require excessive technical skills. Let’s take a look at the details.
Architecture
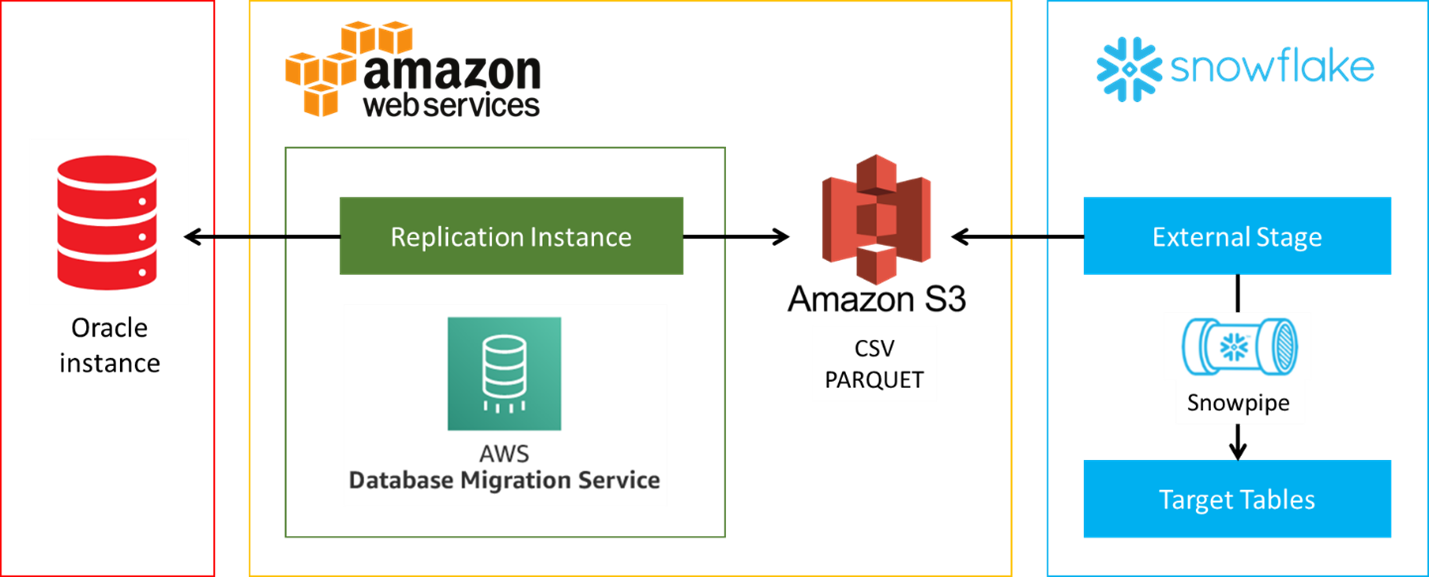
Let’s now discuss our approach that uses Amazon Web Services and Snowpipe. The diagram below presents straightforward architecture.
We connect to Oracle and capture change data using AWS Database Migration Service (DMS). Then, the output is stored in the S3 bucket using text (CSV) or binary format (PARQUET). Additionally, the same bucket is mapped as the source for Snowflake external stage. Finally, we take advantage of Snowpipe to stream staged data to the target tables.
Scalability and performance
Both Amazon and Snowflake components were designed to perform at scale. AWS DMS runs on dedicated replication instances that can be configured starting from t2.micro and ending with r5.24xlarge (96 vCPUs, 768GB RAM). If a single instance is not enough, then it is also possible to allocate replication tasks across a farm of replication instances.
In practice, source Oracle database becomes the bottleneck. Extracting data requires additional resources that are shared with OLTP workloads. AWS DMS supports two methods of reading source data:
- Oracle LogMiner – redo log files are read via Oracle API
- AWS DMS Binary Reader – raw redo log files are read directly
If you are running multiple replication tasks or the CDC volume is large, using the binary reader should significantly reduce the I/O and CPU impact on your source Oracle database.
AWS DMS Setup
The service requires the following elements to be configured. Detailed instructions are available in the Amazon documentation: https://docs.aws.amazon.com/dms/latest/userguide/Welcome.html
- Replication instance – the machine where AWS DMS runs database migration tasks. You can choose machine class according to your needs. Choose carefully – the bigger the machine, the higher fee you will be billed for the time the instance runs. Free-tier t2.micro suits perfect for gathering first hands-on experience with the service for free.

- Source endpoint – the connection details of the source – Oracle database in our scenario. Oracle versions 10.2 and above are supported. It is also possible to choose other sources, the full list is available in the documentation. AWS DMS documentation includes detailed instructions on how to configure Oracle instance and grant the necessary privileges.
- Target endpoint – the connection details of the target – S3 bucket in our scenario. Apart from the bucket name the endpoint contains target format settings. You can choose CSV or Parquet, there are plenty of additional format configuration options.
- Database migration task – the main task definition. You specify which tables are to be replicated, it is also possible to specify all current and future tables from a schema. The interesting option is the migration type. It allows 3 different scenarios:
- migrate existing data – perform a one-time migration
- migrate existing data and replicate ongoing changes – perform it one-time and then continue replicating data changes – this is a real CDC scenario
- replicate data changes only – give up on the initial migration, but replicate the data changes
AWS DMS stores the new or changed rows in the target S3 bucket. Each row has one additional column – operation type (I – insert, U – update, D – delete). When running, the migration task collects detailed statistics, for example how many inserts, deletes, updates in each table were detected.
Snowflake Setup
Firstly, set up the S3 storage integration and external stage for the bucket used as the target in AWS DMS. Snowflake provides detailed documentation:
Then, you should be able to list all the files created by AWS DMS replication task in your stage.
list @aws_dms_stage;
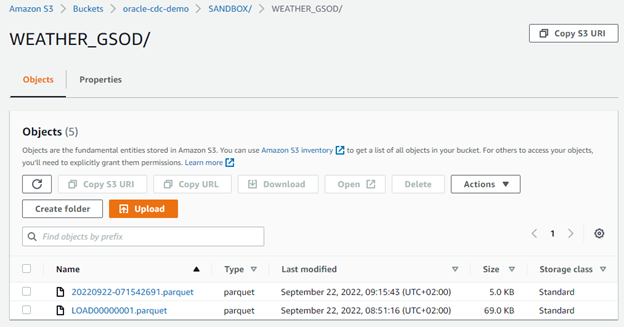
Please note that the last file contains data from the initial load.
Then, it is time to define the Snowpipe job:
create or replace pipe dms_pipe auto_ingest=true as
copy into weather_gsod_parquet
from @aws_dms_stage/SANDBOX/WEATHER_GSOD
file_format = (type = 'PARQUET');
The basic configuration contains only:
- source the data location in the external stage
- target table name
- file format
- auto_ingest=true – it allows to automatically run load when new files arrive at S3 bucket
Auto ingestion requires an additional configuration in AWS. You need to enable notifications for the bucket and pass them to dedicated SQS queue created by Snowflake.
Detailed manual and other configuration options can be found in Snowflake documentation: https://docs.snowflake.com/en/user-guide/data-load-snowpipe-auto-s3.html
Demo
- Let’s check the initial number of rows in Oracle.
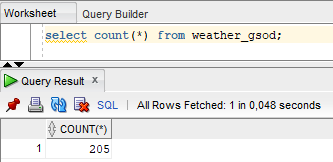
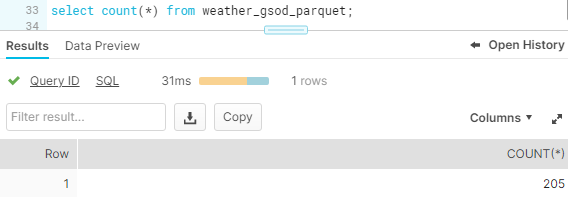
- Migrate existing data to Snowflake.
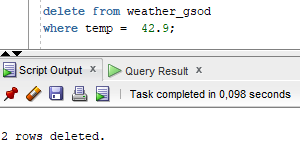
- Delete 2 rows in Oracle.
- After a while, the Parquet file will appear in S3.
- Then check what happened in Snowflake.
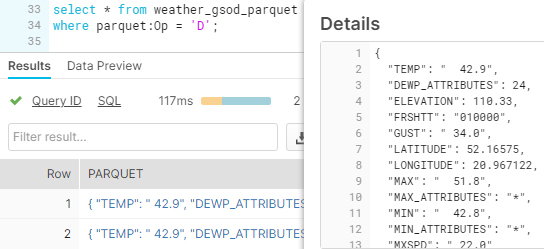
Snowpipe has loaded the CDC data into the table in Snowflake.
Two rows were deleted in the Oracle instance, so 2 new rows appeared in Snowflake. These records are marked with the letter D, which means DELETE operation.
Thanks for reading.


